Week 15 - App Distribution
Corresponding Text
http://developer.android.com/distribute/tools/launch-checklist.html https://developer.android.com/studio/publish/preparing.html
Once we've developed a working app, we'd like to be able to distribute it to other people. Typically, this involves publishing the app to the Play store but we could also generate an APK (Android application package) to distribute without using the Play store.
Preparing for Release
App Icon
Every app should have a unique icon that will allow users to quickly identify it among other applications in the launcher. When choosing or creating icons, it's important to create icons for different display densities: hdpi, mdpi, xhdpi, xxhdpi, and xxxhdpi. This tool can be used to create simple icons for the various diplay densities.
Once you have icons, change the Project view in Android Studio to show the
project structure (rather than the Android app structure). In the
app/src/main/res folder you will see several folders with names that start
with mipmap-; these are the folders where the app icons should be stored.

To ensure that the icons are used, make sure that the following appears in the app's manifest:
<?xml version="1.0" encoding="utf-8"?>
<manifest ...>
    <application
        ...
        android:icon="@mipmap/ic_launcher"
        ...>
        ...
    </application>
</manifest>
Logging
When preparing the app for release, we are required to disable logging and
debugging in the release build. To disable debugging, make sure
android:debuggable doesn't appear as an attribute to the <application> tag
in the manifest.
With regard to logging, we could remove uses of the Log class in our code.
An alternative is to wrap calls to the log class in an if-statement like this:
if (BuildConfig.DEBUG) {
    // Log code
}
This will prevent logging in any non-debug build. Note that the app must be run in debug mode in order to see the log messages. Be careful with this, however, as adding too many if-statements could impact performance if they are evaluated many times. Restricting the use of logging to catch-blocks to log exception details and using an if-statement might be a good compromise.
Generating a Signed APK
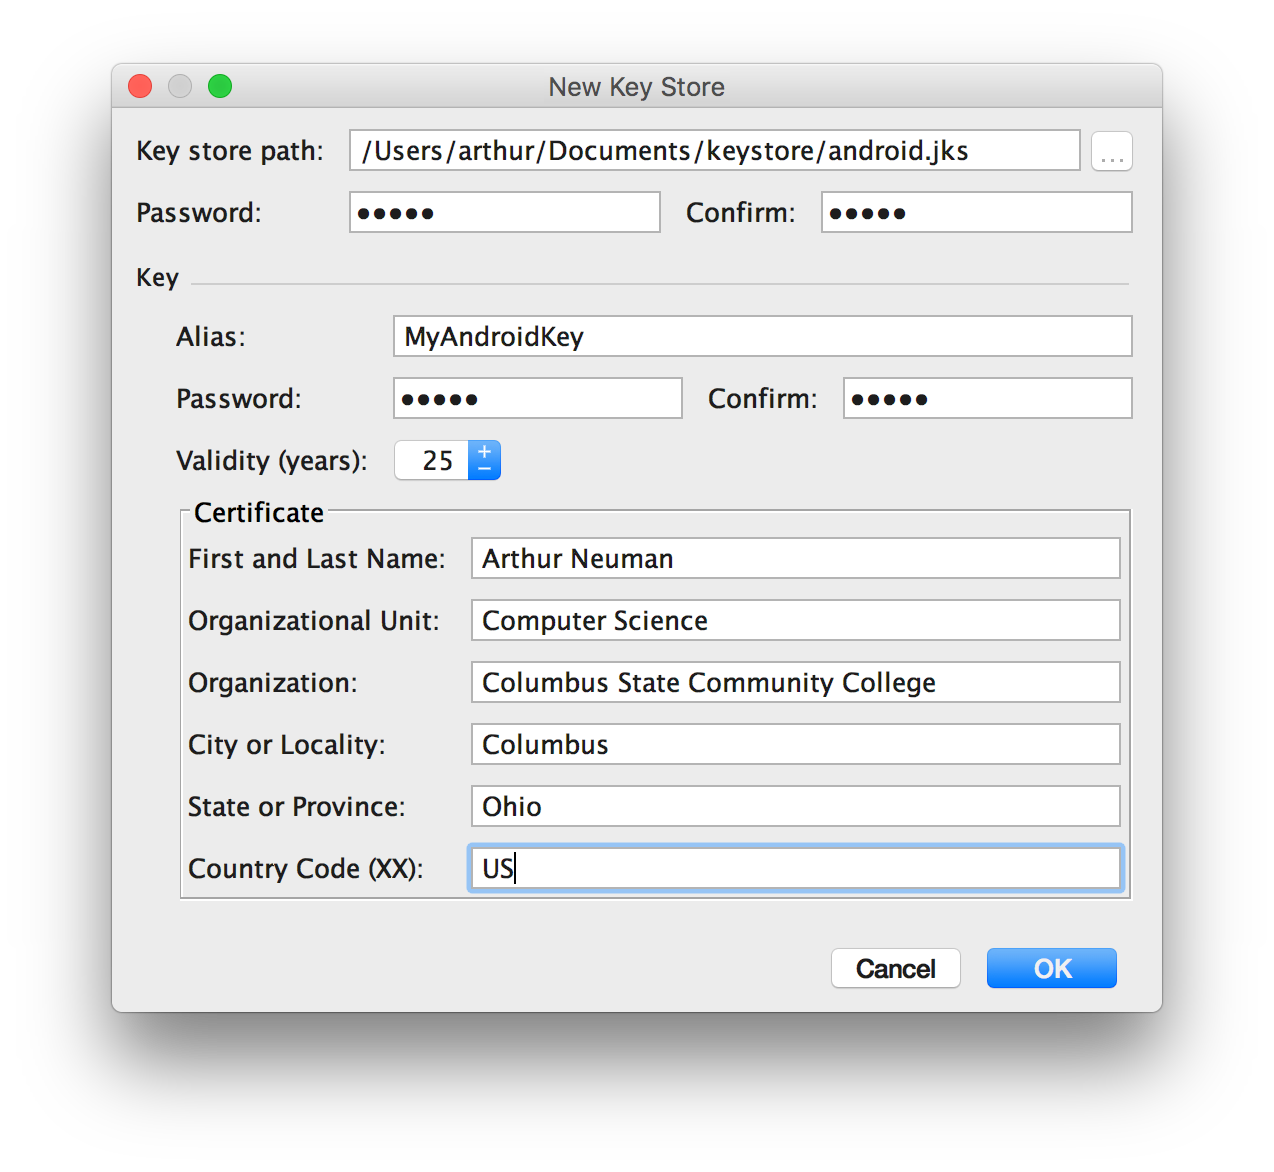
Android requires that every application be signed with a certificate that only the developer has the private key for - this servers to identify and verify the author of the application. To create signing keys for the app, follow these steps:
- Select Build -> Generate Signed APK... from the menus.
- Select the default module and click Next.
- Create a new Java keystore by clicking Create new....
- Chose a location and password for the new keystore and key. Enter the information pictured below. Click Next.
- Be sure that release is the selected Build type and click Finish.
This process will generate an APK in the app folder in your app's root
directory.
Distribution
Now that we have a signed APK, our next step should be to test the app - fixing any errors we encounter and repeating the release process. Once we've tested the app thouroughly, we are ready to distribute the app. The simplest way to distribute the app is by sending the APK via email or making it availalbe for download from a website. Alternatively, we can publish the app in the Play store.
In order to publish the app, you'll need to create a publisher account and pay the registration fee at https://play.google.com/apps/publish/signup/. Once registered, you'll be able to upload your APK and enter the details of your app that will be displayed in the play store.